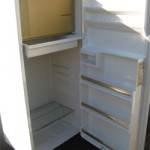
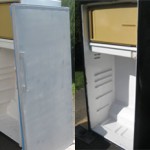
I’ve dreamed of having a kegorator since I was in college, but never had the money to invest in one. So after dreaming for the last 15 years, I’ve decided to go ahead a build my own. I have an idea of how to do this, but like building anything thinking you know how to do it and doing it are two different things. To start with, you need a fridge or freezer to make a kegorator. I found an old fridge through a group called freecycle (www.freecycle.org). I think this fridge will work well it is about 5 ½ feet tall and about 30 inches wide. What I like about this fridge (beside it being free) is the door is flat (no curvature), it is not heavy, and will fit 3-4 corny kegs, co2 tank and regulator. Any bigger I think there would be a lot of wasted space.
Day 1 – Cleaning
The unfortunate part about getting a used fridge is that it may not be ready to go right into the conversion step. This was the case for me and so this is where I begin my journey. As I said before, I got the fridge for free; my father-in-law and I plucked the fridge out of a guys basement. It had mildew and mold over the bottom part and in the door seal gasket. There were a couple small scratches on the side, but all in all it looked in good condition. To get rid of the mold and mildew I simply sprayed the fridge with bleach let it sit for 5 minutes and hosed it down. No more mold and mildew. Just for good measure I took a bucket of Mr. Clean and scrubbed down the fridge to get off any other crap.
Day 2 – Painting
Now that this old fridge is nice and clean, I’m going to make it look good. Please note that many older fridges have lead based paint, so be careful if you do any scraping. The Fridge I have is in pretty good condition, no real visible damage. The first thing you’ll want to do is tape up, cover, or take off anything you don’t want to get paint on. I took off the door and the chrome hinges. When Painting anything you need to make sure your paint can adhere and not peal off in a couple of weeks. Start with a good primer; I used Rustoleum Professional Primer which is formulated for metal (among other materials). I sprayed two coats of primer. After waiting a couple hours, it was onto the finish coat. For the finish coat I used a Rustoleum Professional in black. I sprayed a couple of coats, while it is obvious I’m not a wiz with the spray paint, it looks a whole lot better then when I started. I think I will apply another coat to try and even out the finish.
Next Day
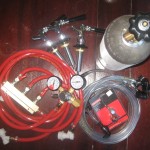
After many days of more work then I care to do. I’m finally back to my beloved project. My plan is to install a 3 tap system in this fridge. I took an empty 5 gal corny and figured I could fit 3 of them in the Fridge. So from Midwest Home Brewing supplies I ordered a triple tap system. It came with a 5lb co2, a dual gauge regulator (1 gauge for the pressure in the tank the other for the pressure on the line), a 3 way manifold and all the co2 and food grade tubing. I also ordered 3 4 ½ inch refrigerator conversion taps, because have picnic taps hanging out of the front of the fridge is not that pretty. I chose to get all my part in a complete system so that I didn’t forget any parts, but I could have probably saved $50 or $60 by shopping other stores like Micro Matic.
With all my parts arriving and ready to start assembly, I took my co2 tank over to my local Welding/Gas Supply store and had the tank filled. Nice and easy, and it cost $11. If you never filled up a co2 tank before, they can be very cold right after the fill and for a couple of hours after.
Drill Tap Holes
With the tank filled and all the parts in hand it’s time to
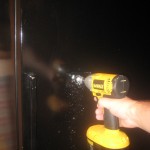
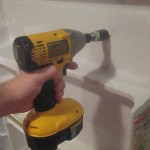
make your first holes in the fridge. The taps I ordered were 4” x 1”, so I needed to drill 3 1” hole. For this I used a 1” carbide hole saw. Since the front of my fridge was a thin sheet of steel, it took awhile to cut though. BUT, before you start to drill, know where you are going to make your cuts. There are 3 things to keep in mind when measuring for the holes.
- Outside tap placement. You’ll want them high enough for a comfortable pour
- The inside molding. On most fridge doors there are shelves, butter dishes, and or egg holders. You don’t want to be drilling through an edge. You’ll want to make sure the nut on the inside of the door will rest flush against the door.
- Make sure there is enough room to close the door with the shank of the tap (pipe that goes through the door) and a inch or so of tubing that will connect to the nipple.
Once you have the spots marked where you want the taps, you may want to put a piece of 2” tape over it (especially with plastic fronts). The tape will help reduce the chance of splintering when you drill. If you are using a hole saw, once the drill bit goes through switch to the inside of the fridge to finish the hole. This will give you a nice clean cut. Repeat if you have additional taps.
Attach Tap to Fridge
With your holes bored, assemble you taps if they are not already assembled. Attach the handle to the tap and screw the tap to the shank. There should be a compression nut on the shank that screws onto the tap. Next, unscrew the brass nut on the shank. Insert the shank through the door and reattach the brass nut on the inside, hand tighten as much as possible. With an adjustable wrench tighten brass nut while holding the tap vertical (don’t hold by the handle). Now repeat for each tap.
Attach Beer Lines to Tap
With the kit I bought the beer lines had the ball lock quick disconnect and a picnic tap on the other end. I want to keep the quick disconnect, but where the picnic taps are I want to attach it to the tap on the fridge door. First cut off the picnic taps. You can try attaching the hose directly to the shank barb, but I doubt you’ll get it to fit on. The trick here is to soak the hose tip in boiling water for a couple minutes to soften it up. Now push the hose all the way to the end of the barb. As the hose cools, it will contract creating a secure connection. I went the extra step and attaché colored zip ties to my line so I can easily figure out which line goes to what line.
You have now finished attaching the taps. The next step in the process is attaching the co2.
Attach the co2 tank
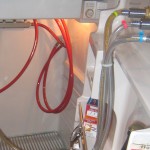
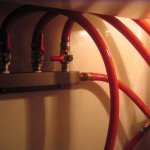
At this step you should have already filled the co2 tank. For my kegorator, I’m setting up a 3 tap system with 1 co2. Since there are multiple tanks on only 1 co2 source, you’ll need to install a gas manifold. For this project, a 3 way manifold is required. Find a place on the inside of the fridge to fit this, it should be easily accessible and out of the way of the kegs, At least 25” from the bottom. The manifold should have at least 2 screw holes. Mark the location of the holes on the wall of the fridge. Next, drill two small pilot holes and using #6 or #8 stainless steel machine screws attach the manifold. Make sure you are using stainless steel, brass, or plastic on the inside of the fridge to avoid rusting. With the manifold attached, you’ll need to attach the main input gas line into the manifold to the co2 tank. If you’re keeping the tank in the fridge, then skip to the next step, other wise keep on reading. You will want to get a drill bit just wide enough to fit the hose. Using a ¾” bit drill a hole from the outside in at roughly the same level as the input into the manifold, but keep in mind the distance from the hole to the tank and that your hose is long enough. There should be a quick disconnect on the end of the hose. This will obviously not fit through the hole you just drilled. To remove the quick disconnect from the hose, unscrew the clamp the end of the hose (this clamp attaches the hose to the barb on the end of quick disconnect). Once the hose has been removed from the Quick Disconnect, thread the hose through the hole. After the hose is through the wall of the fridge, reattach the Quick Disconnect. Make sure the clamp is tight so the is no gas leak.
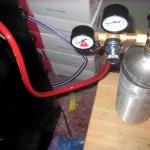
Connect the regulator to the co2 tank and the hose to the regulator. (Do not turn on anything, yet)
Test the Gas Line
First, create a solution of soapy water in a spray bottle. Next close all the values in the manifold. Turn the regulator so that it is completely closed. Open the co2 tank all the way, listen for any hissing sounds. Next open the regulator so there is 5lbs of pressure(PSI). Once again listen for any air leaks. Spray the soap solution on each joint to make sure there are no leaks. If there are leaks you’ll see little soap bubbles form, fix the leaks by tightening the clamps and or fittings.
Attaching the kegs
Almost done, now that the co2 tank, regulator, and manifold are installed you just need to add the Corny Keg. Place keg in to fridge attach the co2 gas line to the Gas IN Post (usually will be marked as IN). In an empty keg it is the one what isn’t connected to the tube that runs to the bottom of the tank. Make sure the gas manifold is closed, handle perpendicular to line. If you have not sanitized the beer line and tap, do so now.
To sanitize, I use Beer Line Cleaner which I have mixed according to directions in a 2.5 gal corny keg. I pressurize this mini keg with a portable picnic co2 cartridge. Then attach the beer line to this keg and pull through the beer line using the tap on the front of the fridge.
Next attach the beer line to the beer keg. At this point I usually release the pressure in the tank, turn gas line on at the manifold, and set my co2 tank to 10PSI. Let it sit for a couple hours, but if your impatient like, you will want to pour a couple of glass and discard – 1 for the BLC, and 2 more that are going to be full of sediment.
Now enjoy!


Recent Comments