How to Use and Care for Your Oak Barrel
A couple years ago I was fortunate enough to receive a document from a highly respect Brewmaster that contained a collection of emails from breweries regarding how they care for their barrels. To me, this document was the Holy Grail of barrel care; it contained advice from Avery, New Holland, Schlafly, Ithaca, and numerous local pubs and breweries. There’s a wealth of information here, unfortunately most of it does not apply to homebrewers nor the size barrels we use. However, I’ve pulled out bits and pieces that I think will help you explore the world of barrel aging and included a recipe for the Rye Barrel Stout at the end.
But first, a couple of things to keep in mind before going down this road of barrel aging:
- Do you have a place to store it where the temperature doesn’t fluctuate radically and is fairly cool?
- Depending on the size of the barrel, do you brew enough to fill it and keep it filled?
- The smaller the barrel, the faster the barrels’ qualities are transferred to the beer.
What to do before the first fill:
The hardest part about barrel aging as a homebrewer is getting the barrel ready for the first time since there are so many what ifs. where did the barrel come from? Will it leak? Is it broken? Does it have any infections? And how to get it ready for your beer. If you have not purchased a barrel yet, it behooves you to get a sealed barrel that is freshly emptied from a spirit or wine maker. If the barrel you get is not sealed and has dried out, you could be in for a world of issues. It is beneficial to you to get a freshly emptied sealed barrel because there is a much smaller chance the barrel is bad, has bad bugs, mold in it, or is damaged.
Sealing a Dry or Leaky Barrel:
A quick note if you have an unsealed barrel or you are not sure, you want to make sure you get the barrel sealed before you add any beer.
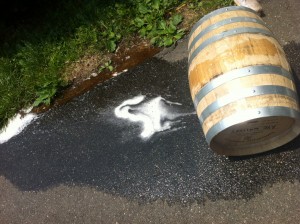
To seal a barrel, you need to expand the oak staves so they are tight against each other and the metal ribs. When wood gets wet it expands, however water also carries tons of bacteria and other bad things for you barrel. In order to lower your exposure to damaging your barrel, use 190° water to expand the staves. At 190° you’ve killed off all the harmful bacteria in water. After filling your barrel all the way to the bung and it’s stopped leaking after a couple hours, you have a sealed barrel and it is ready for beer. If your barrel is still leaking, leave it over night (out of the sun if possible). The following day, empty the barrel and repeat. If you cannot get your barrel to seal after this second try, you should return it and get your money back or turn it into a planter.
Do not store water in your barrel for more then a day, it can cause mold growth.
Sanitizing, Getting the barrel ready for beer:
First make sure you have beer, fully fermented and ready for barrel aging.
The night before you are ready to fill your barrel with your homebrew, heat up enough water to 190° to fill your barrel 1/2 way up or as much as you can in your kettle. Empty the barrel of any spirits or liquid that may be in there, add the hot water to barrel and replace the bung. With the hot water in the barrel, you’ll want to vigorously slosh the water around making sure all the surfaces have good contact with the hot water. After sloshing around for several minutes, Let the barrel sit for an hour or so, rotating it every once and awhile allowing all the stave joints to have extended contact time with the hot water. This will ensure you have no leaks.
Once you are sure you have no leaks, empty out the hot water, replace the bung, and allow the barrel to cool. This couldtake 6 hours or more depending on the ambient temp.
Once the barrel is cool, you can add your beer and begin the aging process. I have an 8 gallon rye barrel. When I received my Barrel from Woodinville it was a freshly emptied rye barrel. My first batch through the barrel took about 3 days before it had the oak (vanilla & coconut) flavors I wanted. The next batch will probably take a couple days longer.
Rules of Thumb for Barrel Aging:
- The smaller the barrel, the mores surface contact per volume, the faster the beer takes on the flavors from the barrel.
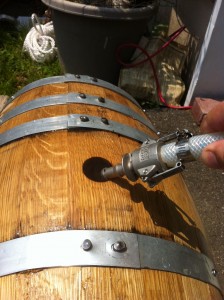
- make sure you use a sanitized wine thief to take samples. For a small barrel, start taking samples after a couple days, the larger the barrel the more time you can allow.
- The more you wash, use, or rinse a barrel, the longer it will take to “oak” a beer. At some point the barrel will become virtually useless for getting the vanilla and coconut flavors and may just be best for sour beers.
After Beer Care for the Barrel:
The best care for a barrel is to always have it full. Once you finish with one batch have a second batch ready to go in after a quick rinse with hot water to get out any sediment.
Short Term Storage:
The next best option is to only have a short period of time when the barrel is empty. In this situation, you want to have some spirit available, something high in alcohol. Since I have a Rye barrel, I bought rye, but you can use Vodka, Bourbon, Scotch, tequila, or whatever. I would personally use what ever the barrel was before you got it. If it is “brand” new, then choose your poison wisely.
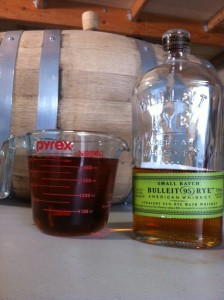
Like in the previous scenario, rinse the barrel with hot water to remove any sediment from the previous batch and empty. Allow the barrel to cool and then add enough of the selected spirit back into the barrel to allow you to coat all the staves and have just a bit at the bottom to allow for some evaporation. For my 8gallon barrel I added 2cups of Bulleit Rye back to the barrel. There is enough at the bottom when I shake the barrel I can just make out the sloshing sound.
Long Term Storage:
I’m not a fan of this, but you can store your barrel long term. One thing you can do after cleaning out the barrel is to light a sulfur stick in the barrel. How much sulfur to burn is in proportion to the size of the barrel. Do Not use this method on a spirit barrel that still has an aroma of alcohol, it may cause an exploding barrel. There are other methods as well, but if you have a barrel use it or give it to someone who will.
Good luck with your barrel. If you have other methods that work, please leave a comment!
Recipe Specifications
--------------------------
Boil Size: 9.54 gal
Post Boil Volume: 8.84 gal
Batch Size (fermenter): 8.00 gal
Bottling Volume: 8.00 gal
Estimated OG: 1.079 SG
Estimated Color: 39.44 SRM
Estimated IBU: 43.1 IBUs
Brewhouse Efficiency: 75.00 %
Est Mash Efficiency: 79.7 %
Boil Time: 60 Minutes

Ingredients:
------------
Amt            Name                                     %/IBU
18 lbs         Pale Malt (2 Row) US (2.00 SRM)          75.3 %
1 lbs 12.0 oz  Chocolate Malt (350.00 SRM)              7.3 %
1 lbs 12.0 oz  Oats, Flaked (1.00 SRM)                  7.3 %
1 lbs 6.4 oz   Caramel/Crystal Malt - 40L (40.00 SRM)   5.9 %
1 lbs          Roasted Barley (300.00 SRM)              4.2 %

1.75 tbsp      PH 5.2 Stabilizer (Mash 60.0 mins)

17.00 drops    fermcap (Boil 60.0 mins)
1.50 oz        Magnum [14.00 %] - Boil 60.0 min         39.0 IBUs
2.00 Items     Whirlfloc Tablet (Boil 15.0 mins)
1.00 tsp       Yeast Nutrient (10 min)
2.00 oz        Willamette [5.50 %] - Boil 5.0 min       4.1 IBUs

2.0 pkg        Safale American  (DCL/Fermentis #US-05)

3.0 day        American Oak Rye Barre

Mash Schedule: Temperature Mash, 1 Step, Full Body
Total Grain Weight: 23 lbs 14.4 oz
----------------------------
Name                Description                       Step Temperat Step Time
Saccharification    Add 9.46 gal of water at 174.1 F  156.0 F       40 min
Mash Out            Heat to 168.0 F over 10 min       168.0 F       10 min

Sparge: Fly sparge with 3.45 gal water at 168.0 F

Fermentation Schedule: Primary 6 days @68°


Recent Comments